Pilates is an excellent form of exercise and takes elements from yoga, calisthenics, and ballet. If you want to add more support to the exercises, you might consider using a small Pilates ball. It’s good for balance and opens the door for more types of Pilates workouts.
Here’s how to properly use a small Pilates ball:
- Choose the right firmness level.
- Stretch with the ball.
- Support your core and spine.
- Practice good form.
- Try simple Pilates ball exercises.
- Move to more challenging exercises.
Using a Pilates ball allows you to target your core while providing support for your spine. Plus, these fitness tools are known for promoting overall fitness and flexibility. In this article, you’ll learn everything you need to know about using a small Pilates ball properly, so make sure to continue reading.
1. Choose the Right Firmness Level
Before you get to use the small Pilates ball, you want to choose the correct firmness level. The firmer you make the ball, the more challenging the exercises become. When teaching beginners, I show them how to deflate the ball a bit until they get more used to using it.
When the ball is firmer, it’s harder to “squish” it. That means it’s also harder for you to hold it with your legs or hold your balance. Those more experienced in Pilates may not have any trouble with an extremely firm ball. However, your ball should always be filled to a firmness level that you’re comfortable with.
Being able to choose the firmness level of your Pilates ball comes with several benefits. You can inflate it more over time, allowing the ball to provide more challenge as you grow stronger. You can also quickly deflate it for storage or transportation.
Filling the ball with air is also simple. Most Pilates balls come with a straw or cap that allows you to breathe into them. If you want to use an air pump, you can do that too. Overall, being able to adjust the ball’s firmness makes it a versatile fitness tool.
2. Stretch With the Ball
It would help if you stretched before any workout. Stretching prepares your body for exercise and helps loosen up your muscles, lowering the odds of injury.
If you have the ball inflated already, you can use it during your pre-workout stretch. Start by stretching your arms and legs normally, then get on your mat. Keep the mini ball under your lower back and stay aware of your body. You can slightly roll the ball to stretch your back or focus on your breathing from this position.
Once you feel limbered up, you can move on to the rest of your Pilates workout. This exercise often focuses on the back and core, so you want to make sure you stretch your body before and after the training.
You don’t want to try a Pilates session without stretching. It’s too easy to strain your body if you skip it.
3. Support Your Core and Spine
Pilates focuses on improving your core and spine. However, some people may feel too much pressure during their workouts- a small Pilates ball can help with that.
The ball takes some of that pressure off of your spine. When in the proper position, it helps with spine alignment and your overall form.
You can add the Pilates ball to just about any move that you’re practising. For example, during toe taps, you can place the ball under your lower back. This position stretches your back more while offering additional body support on the mat. Plus, you’ll have the added challenge of staying balanced using your core.
In short, the Pilates ball provides more support for your core and spine. Always check in with your body during workouts. If the position isn’t comfortable, you may need to move the ball or adjust its firmness level before continuing.
4. Practice Good Form
It’s essential that you practice good form during Pilates. Failing to maintain an adequate form during exercises, and when using a small Pilates ball, can lead to pulled muscles, strains, or disc injuries.
For example, when performing exercises to strengthen your core, you’ll want to pay attention to the positioning of your spine and pelvis on the ball. If not secured, your back muscles may become strained from poor form.
If using the ball for the first time, try practicing in front of a mirror. That way, you can see that it’s in the correct position. You want to make sure that your back is in alignment, and the ball is positioned to support your body, without slipping or rolling away.
To learn more about practicing good form, check out this YouTube video:
5. Try Simple Pilates Ball Exercises
When using the Pilates ball, you also want to try working out different areas of your body. Here are all the places you want to work on, with examples of beginner exercises to try with the ball:
- Core: Incline leg drop, Pilates ball crunches
- Back: Ball roll-up
- Thighs: Pilates ball lunges
- Arms: Pilates ball push-ups
- Glutes: Chest squeezes
All of these exercises are easy for beginners, and I will cover them in more detail below. You’ll want to choose a mixture of these exercises to use during a Pilates session, so you get a full-body workout with your mini ball.
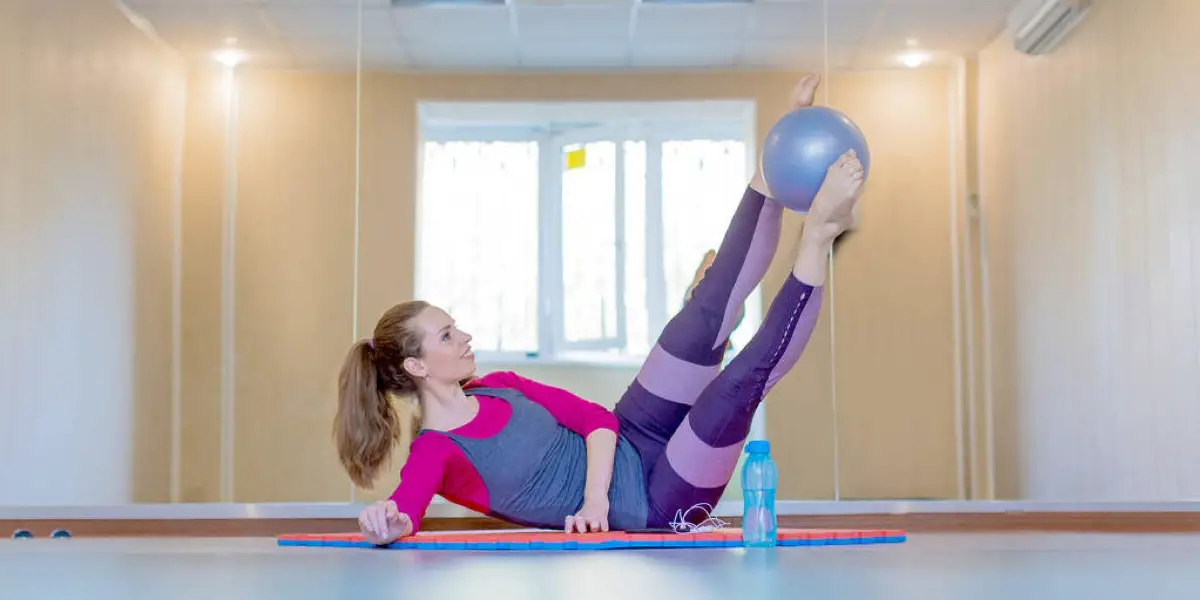
Incline Leg Drop
Follow these steps to safely do an incline leg drop:
- Start by lying on your back with your tailbone on the ball. This position should push your hips upwards.
- Lift your legs into a flat, tabletop position. Make sure to do this slowly so that you can find your balance.
- Move your legs upwards until they’re straight up in the air. You want your neck to feel relaxed as you do this- your core should be the center of your balance on the ball.
- Repeat this motion with your legs. You should feel this in your core more than anywhere else in your body. If you want to modify this move, start with both legs up, then lower one at a time instead.
Pilates Ball Crunches
This exercise is another that works your spine and core.
Follow these steps to complete the crunches safely:
- First, place the Pilates ball under your upper back with your hands under your head. Your lower back stays on the mat as you lift your shoulders off the ball- you shouldn’t strain your neck!
- While making this motion, make sure that you keep your core tight. It helps if you focus on your navel and spine. It’s a wonderful way to do crunches since you receive additional support from the small ball.
Ball Roll-Up
To do a ball roll-up, follow these instructions:
- Lie down on your mat facing downwards.
- Stretch your arms and legs out like Superman, with your ball pressed into your hands.
- Slowly lift your torso and look up while rolling the ball towards you.
- Then, roll it away and look back down at the floor.
- Make sure to exhale when coming up.
Pilates Ball Lunges
Next are the Pilates ball lunges. Here’s how to do them:
- You’ll need to have a chair in front of you.
- Move one leg back and place the ball under your knee, then gently move up and down. You shouldn’t come off of the ball completely.
- Repeat this move a few times before doing it with your other leg.
This video shows another variation of this move, without using a chair to support yourself:
Pilates Ball Push-Ups
Pilates ball push-ups are easy to start and significantly build your strength over time. Here’s how you can do them:
- To start, lower yourself onto the mat with the mini ball under one of your hands.
- Add the other hand to the ball and move into an upwards plank position when you’re ready.
- Carefully lower yourself towards the floor like you would in a standard push-up.
- From there, you can raise yourself back up until your arms are straight.
You can modify this move by performing the exercise with some of your weight balanced on your knees.
Chest Squeezes
Finally, ball chest squeezes are great for building strength in your arms. You can perform this move standing or sit as well. You can even lay on the mat and push the ball into the air as an alternative workout method:
- Start with your ball in front of your chest. Don’t hunch your shoulders over while you press into the ball with your palms.
- Next, hold the Pilates ball straight in front of your body. Then, slowly pull it back in towards your chest as you squeeze.
6. Move to More Challenging Exercises
Once you’re feeling more comfortable using the ball, you can move on to more challenging exercises! Here are a few that I recommend you try out. Remember, you can always modify them if you need to:
Back Bridge and Squeeze
This exercise focuses on your back.
Follow these steps:
- Start by laying down with your back on the mat and the ball between your knees. This placement also helps to work your thighs while giving you support.
- Press your feet into the floor and raise your pelvis into a bridge. You mustn’t overextend your spine!
- While on the bridge, squeeze the ball between 10 and 20 times, depending on how long you want to hold it. You can start with a few squeezes first and gradually increase them, if you’re comfortable with doing so.
- For more of a challenge, squeeze the ball 20 times for a rep, with five reps creating one set. It’s most effective if you do at least three sets. However, you can always work up to this amount of squeezes over time.
Side Plank With Glute Burn
This move from Byrdie is a side plank combined with leg lifts. Here’s how you can do it:
- Start in a side plank position and put the ball under your hip. Make sure to support yourself and keep your body straight- you should stay balanced with the ball and your arm towards the floor.
- Lift your upper leg slowly, then lower it. You’ll want to repeat this several times before moving to the other leg. For a more effective workout, you can complete five to six reps.
Signs of Incorrect Use
If you’re not using the Pilates ball correctly, you’re sure to feel it! You should always stop your exercises and adjust the ball’s placement if it’s uncomfortable, as it can be a sign that you’re using the ball incorrectly.
Here are a few more signs of incorrect use that you’ll need to stay aware of:
Back and Neck Pains
Improper form can cause harm when you’re doing Pilates. Most people who experience lower back or neck pain after Pilates don’t have the correct form. If you feel strained in those areas, you’ll want to take a break and think about how you were performing the move.
Slipping Ball
If it feels like the ball is constantly slipping around, it might not have the proper level of firmness. Or, you may not be performing the moves correctly. Take a moment to move the ball back into the right place.
If you don’t have a large enough mirror to check your form at home, you can ask a friend or family member for help. Have them take pictures or record you. After watching the video, you should tell where you need to work more on your form.
Other types of balls to consider
I’ve focused on the small Pilates ball for this post, you can make use of a different exercise ball if you have it. Pilates is very flexible (pun intended!) and you can incorporate stability balls, gym ball, a swiss ball, yoga ball, really any type of fitness ball, but probably not a golf ball!
The size and weight of the ball would determine how it’s used, I especially like using a stability ball, check out my 10 favourite moves article to see how to incorporate it.
Final Thoughts
To summarize, you want to start with more straightforward ball exercises and then move on to more challenging ones. Doing so ensures that you know how to keep your balance with the ball without straining your body.
Small Pilates balls are excellent fitness tools. They’re easy to use, deflate for convenient storing, and provide several health benefits during your workout.
It can take some practice to feel comfortable using the ball. The more you incorporate this prop, the more comfortable you’ll be with it.