Pilates is a movement system that looks simple on the surface but delivers deep, lasting results. If you’ve ever wondered how some people move with fluid ease, breathe with intention, and carry strength in their core without bulking up, chances are they’ve tapped into Pilates. It isn’t flashy. It isn’t fast. But it works—especially when you understand what’s behind it.
What Is Pilates, Really?
Pilates is a full-body method of intentional movement, grounded in building core strength, alignment, and control. It was developed in the early 20th century by Joseph Pilates, who originally called his system “Contrology.” Control was the core idea: mastering your movements by mastering your body’s mechanics.
Forget machines and studios for a moment. At its foundation, Pilates is about body awareness—how you move, where your strength comes from, and how to move well without pain. It uses slow, precise exercises designed to activate your deep stabilizing muscles, not just the surface-level ones that dominate in traditional workouts. That’s what sets Pilates apart.
The Core Principles of Pilates
Every Pilates session, regardless of your level, builds on five foundational principles. These aren’t abstract concepts—they show up in every single movement you do.
- Control: You’re not flinging limbs around. You’re moving with purpose, choosing stability over speed.
- Precision: Small details matter. Foot placement, arm direction, posture—all of it is done with intention.
- Breathing: Breathing isn’t passive. In Pilates, you use it to engage your core, release tension, and support your movements.
- Centering: Everything begins from what Joseph Pilates called your “powerhouse”—your core. More on that in a second.
- Flow: Transitions matter. Movements are meant to link together smoothly, which builds endurance as well as efficiency.
These principles aren’t tacked on. They’re your non-negotiables if you want to see results. Skip them, and you’re just going through the motions.
What the ‘Powerhouse’ Really Means
In Pilates, your “powerhouse” isn’t a buzzword. It refers to the central group of muscles that control and stabilize your entire body. This includes your abdominals, lower back, pelvic floor, hips, and glutes. When Pilates teachers talk about engaging your core, they’re not just talking about crunching your abs—they mean firing up the entire center of your body to support every move.
This matters because the body moves as a unit. When your powerhouse is active, you’re more balanced, coordinated, and resistant to injury. When it’s not, the wrong muscles take over. That’s when poor posture, back pain, or inefficient movement patterns sneak in.
In Pilates, everything starts at the center and moves outward. That’s the difference between just moving around and actually training your body to move better.
Why Pilates Works for Core Strength and Full-Body Fitness
People come to Pilates for core strength, but they stay for what it does to the rest of the body. You’ll build stability in your spine, improve flexibility in your joints, and develop muscular endurance without needing weights or high impact movement. And because Pilates is so intentional, it teaches you to move smarter—whether you’re picking up a laundry basket or spending hours at a desk.
- You’ll train your core from all angles. Pilates doesn’t just hit the front of your abs. It trains your deep core, obliques, back, and pelvic floor for 360-degree support.
- You’ll strengthen without straining. Precise alignment and form mean less pressure on your joints and better long-term results.
- You’ll move more efficiently. Pilates teaches your body to recruit the right muscles for the right task. No more overworking your neck or shoulders when doing ab exercises.
If you want strength without bulk, flexibility without hypermobility, and control without tension, Pilates delivers.
Start with Understanding, Then Build Consistency
You don’t need to be flexible, coordinated, or even strong to start. But you do need to understand what you’re doing and why. That’s where this guide comes in—to give you a clear, smart roadmap to build your practice the way it was meant to be built.
Read this once. Come back to it often. These principles won’t just shape how you do Pilates. They’ll shape how you move through your day.
Who Should Practice Pilates and Benefits
If you’re thinking Pilates is only for dancers or the ultra-flexible, you’ve been sold the wrong idea. The truth is, Pilates works for just about anyone willing to slow down, tune in, and move with intention. Whether you’re starting from zero or already active but looking for something more balanced, you can benefit from this method.
Who Pilates Is Actually For
Beginners? Absolutely. You don’t need perfect posture, flat abs, or yoga experience. You just need a floor, a little space, and the willingness to learn your body in a new way. Pilates is especially beginner-friendly because it builds in layers. Every movement, no matter how advanced it looks, starts from foundational skills you can practice from day one.
If you’re dealing with stiffness, poor posture, or nagging aches, Pilates addresses that directly. Unlike high-impact workouts that can feel punishing or inaccessible, Pilates works with your body—not against it. The movements are low-impact but targeted. That means you get strength and flexibility without grinding down your joints.
For people coming back from inactivity or injury (with the okay from a medical professional), Pilates is a smart re-entry point. It conditions your muscles gradually, emphasizes spinal health, and improves coordination. You’re not just throwing yourself into random workouts. You’re retraining movement patterns that actually matter.
Not “flexible enough”? That’s a reason to do Pilates, not avoid it. Flexibility isn’t a pre-requisite. It’s one of the outcomes. Over time, your body becomes more mobile because you’re moving with alignment and control—not forcing your way forward or yanking muscles into positions they’re not ready for.
Top Benefits of Practicing Pilates
What makes Pilates different is also what makes it powerful. It’s not about intensity. It’s about effectiveness. When you practice correctly and consistently, here’s what you can expect:
- Improved Core Stability: This goes beyond just surface abs. Pilates targets the entire trunk—front, sides, and back—so your spine is supported from every angle.
- Better Posture: You’ll start to hold yourself differently. Pilates strengthens the muscles that keep your body in alignment, so you’ll find yourself slouching less and standing taller.
- Enhanced Flexibility: This isn’t about extreme stretching. Pilates gently encourages joint mobility and muscle length across the full body, so movements feel smoother and more fluid.
- Injury Prevention: When your core supports your spine and your muscles work in balance, you’re far less likely to throw out your back or tweak a knee doing everyday movements.
- Mental Focus: Pilates demands attention to detail—how you breathe, where you initiate movement, what’s engaging. That kind of mental presence sharpens focus and relieves stress over time.
Pilates makes you stronger and more coordinated, without leaving you sore or burned out. You won’t just feel more capable during your sessions. You’ll notice the difference when you’re climbing stairs, cleaning the house, or sitting at your desk for hours.
Why Low-Impact Doesn’t Mean Low Results
Some people hear “low-impact” and assume “low-intensity.” That’s not how Pilates works. The goal isn’t to spike your heart rate to the ceiling or leave you drenched in sweat. The goal is to train your body smarter. Build strength precisely, from the inside out. And that’s exactly what Pilates does—without pounding your joints, stressing your nervous system, or sending you home limping.
If you’ve been stuck in an all-or-nothing fitness mindset, Pilates is your reset button. You’ll learn how to move better, feel better, and stay consistent—because your body won’t be screaming at you after every workout.
Don’t wait to “get in shape” before starting Pilates. That’s like waiting to get strong before lifting weights. You get stronger, more mobile, and better aligned by showing up and doing the work—one intentional session at a time.
Understanding Pilates Movements, Positions, and Terminology
Before you dive into Pilates exercises, you need to understand how your body is expected to move—and what those instructions actually mean. Clear movement vocabulary is what makes Pilates so teachable and effective. It sets up common ground between instructors and students, and it helps you follow a workout correctly even when you’re on your own at home.
The Core Positions You’ll Use in Pilates
Most Pilates exercises start from one of a handful of fundamental positions. These are the building blocks of movement. Knowing them helps you visualize and execute each exercise with precision.
- Supine: Lying on your back. Think core exercises where your spine is neutral against the mat. This is where you’ll begin a lot of beginner work—stable and grounded.
- Prone: Lying on your stomach. You’ll use this for back-body activation, like back extensions or hip work. Keep your neck long, scapula anchored, and abs engaged to avoid collapsing into your lower back.
- Seated: Sitting upright with legs extended or bent. Spine stretches, twists, and balance work often happen from this position. Watch that you’re sitting on your sit bones, not slouching behind them.
- Kneeling: On your knees, with or without your hips stacked over them. This could be upright or leading into movement. Kneeling lets you isolate posture and upper body mechanics without support from your feet.
- Quadruped (all fours): Hands under shoulders, knees under hips. This is a key position for core contra-lateral control—think bird-dog or spinal flexion work. Neutral spine matters here. No sagging or over-tucking.
These positions aren’t just start points—they influence your stability, range of motion, and control. Understanding them upfront saves you from guessing later.
Key Pilates Movement Terms Explained
Pilates has its own set of cue words. Once you know them, you’ll stop second-guessing what instructors mean and start moving meaningfully.
Articulation
This refers to moving your spine one vertebra at a time. You’ll see this in exercises like the Roll-Up or Pelvic Curl. The goal is to peel your spine off or onto the mat gradually—not in one big chunk. It trains control, body awareness, and spinal mobility.
Think: “roll through the spine, not flop into it.” That cue alone will change how your core engages.
Flow
Flow is the smooth transition from one movement to the next. You’re not rushing, but you’re not stopping between reps either. Pilates isn’t stop-start like traditional gym sessions. Every move is part of a sequence that builds rhythm, control, and endurance.
Moving with flow minimizes momentum and maximizes control. That’s how you strengthen, not just flail.
Stability
Stability means holding one part of your body still while another part moves. It’s a core Pilates principle. For example, when you perform a Leg Circle lying on your back, your pelvis must stay put while the leg moves. If everything shifts, you’re not stabilizing—you’re just flopping around.
Train the stillness that supports the movement. That’s where control lives.
Precision
Every inch has a purpose in Pilates. You’re not just lifting your arms. You’re aligning your shoulders, retracting your scapula, keeping your ribs from flaring, and engaging your core as you move. Precision keeps you honest. Sloppy reps don’t count here.
Breath Cueing
When a teacher says “inhale to prepare, exhale to move,” they’re not filling time. This is how breath connects to muscle engagement. Exhaling helps activate the deep core. Inhaling maintains openness and support. You’ll breathe intentionally in Pilates, not as an afterthought.
Neutral Spine and Pelvis
Your spine has natural curves. Neutral means maintaining its shape, without flattening your lower back or hyperextending. A neutral pelvis keeps the hip bones level, like a bowl of water not tipping forward or back. This positioning protects your joints and engages your core properly.
If you get neutral right, your movements get stronger and safer.
Start By Practicing the Language
You don’t memorize terms for the sake of sounding smart. You use them to create better movement. Every cue you understand becomes a tool. Every position you learn becomes a setup for success in the next exercise.
Want to move better? Learn the language, then speak it through your body.
Don’t stress about getting it perfect on day one. Return to these definitions. Look for them in your workouts. And when things feel off, check your articulation, alignment, breath, and flow. That’s how solid Pilates starts.
Essential Pilates Exercises for Beginners
If you’re starting Pilates from scratch, these foundational exercises are your launch pad. Each one is designed to teach control, alignment, and engagement from your powerhouse. You don’t need fancy equipment or extreme flexibility. Just a mat, some patience, and a willingness to move with purpose.
1. Pelvic Curl
Starting Position: Lie on your back with knees bent, feet hip-width apart and flat on the mat. Arms rest beside your body, palms down. Keep a neutral spine.
How to Do It:
- Inhale to prepare. Feel your ribcage expand.
- Exhale, press into your feet, and slowly articulate your spine off the mat—one vertebra at a time—starting from your tailbone. Lift to a bridge position where your hips are in line with knees and shoulders.
- Inhale at the top and hold.
- Exhale, reverse the movement by slowly articulating the spine back down to the mat, returning to neutral.
Breathing Cue: Inhale to prepare, exhale to lift and lower.
Watch Out For: Driving the weight into your neck or flaring your ribs. Keep the movement fluid and avoid skipping vertebrae.
2. Chest Lift
Starting Position: Lie on your back, knees bent, feet flat. Hands behind the head, elbows wide. Keep your pelvis in neutral and spine long.
How to Do It:
- Inhale to prepare, keeping your ribs heavy and spine neutral.
- Exhale, engage your abdominals and lift your head, neck, and shoulders off the mat. Keep your gaze to the thighs, not the ceiling.
- Inhale to hold.
- Exhale to lower back down with control.
Breathing Cue: Exhale to lift, inhale to pause, exhale to lower.
Watch Out For: Pulling on your neck or letting the elbows collapse inward. Keep the work in your core, not your upper traps.
3. Roll-Up
Starting Position: Lie flat, legs extended and together, arms reaching overhead. Engage your powerhouse before you even begin to move.
How to Do It:
- Inhale to lift arms toward the ceiling.
- Exhale, nod the chin and roll up, one vertebra at a time, reaching toward your feet. Keep your spine rounded and abs pulled in.
- Inhale at the top.
- Exhale to reverse the movement, rolling down slowly with control back to the mat.
Breathing Cue: Inhale to prepare, exhale to roll up and down.
Watch Out For: Using momentum to lift or letting your feet pop off the mat. Progress by bending knees or using a towel if needed.
4. Single Leg Stretch
Starting Position: Lie on your back with knees hugged into chest. Lift head, neck, and shoulders off the mat. Place right hand on right ankle, left hand on right knee.
How to Do It:
- Inhale, extend the left leg out at a 45-degree angle.
- Exhale, switch legs: bring the left knee in, right leg extends, and switch hands to left knee/ankle.
- Continue alternating legs with control and rhythm.
Breathing Cue: Inhale for one switch, exhale for the next. Or, exhale with every movement to deepen core engagement.
Watch Out For: Rocking the torso or losing neutral head-neck alignment. Keep your chest lifted and spine stable.
5. Rolling Like a Ball
Starting Position: Sit at the front edge of your mat. Hug your knees to your chest, hands on shins or ankles. Lift feet off the mat, balancing on your sit bones, spine rounded.
How to Do It:
- Inhale, roll back onto your shoulder blades, keeping your shape tight.
- Exhale, use your core to roll smoothly back up to balance without letting your feet touch the ground.
- Repeat with control and minimal momentum.
Breathing Cue: Inhale back, exhale forward.
Watch Out For: Using your neck to roll or flopping onto your spine. Keep the shape compact and initiate movement from the abdominals.
6. Spine Twist Supine
Starting Position: Lie on your back, arms extended straight out to the sides, palms up. Bring knees to tabletop (90 degrees at hips and knees).
How to Do It:
- Inhale, rotate your legs to the right, keeping shoulders grounded.
- Exhale to return to center.
- Inhale, twist to the left.
- Exhale back to center. Repeat side to side.
Breathing Cue: Inhale to move, exhale to return center.
Watch Out For: Letting one shoulder peel off the mat or losing control at the end range. Your range of motion only counts if the upper body stays grounded.
7. Back Extension (Swimming Prep)
Starting Position: Lie facedown with legs extended, arms straight overhead. Keep legs and arms hip- and shoulder-width apart. Draw abs away from the mat to protect your lower back.
How to Do It:
- Inhale, lift your head, chest, arms, and legs slightly off the mat. Eyes remain down, neck stays long.
- Hold for 3 breaths, focusing on lifting from the upper back and glutes, not the lower back.
- Exhale, lower everything with control.
Breathing Cue: Inhale to lift, exhale to lower.
Watch Out For: Compressing the lumbar spine. Focus on lengthening as you lift, not just height.
How to Progress Safely
Start with slow, controlled reps. Too fast and you lose form. Too many and you override technique with fatigue.
Begin each session with 2 to 3 of these exercises. Focus on precision, feel your form, and build from there. Once you’re comfortable, layer in more reps or combine 4 to 5 moves into a short circuit.
Your foundation lives in these basics. Master them, and everything else in Pilates becomes easier to learn and more powerful in practice.
Core-Focused Pilates Exercises
Nearly every move in Pilates touches your core, but this section is about the ones that live there. These are the exercises built specifically to train your powerhouse—layer by layer, from the deepest stabilizers to your obliques and everything in between. These aren’t crunches. They’re total core sessions designed to help you move, breathe, and function better.
Here’s what you’ll get from these: Strength that supports your spine. Endurance in your deepest abdominals. And better control when you’re lifting, twisting, or even just sitting upright. You’ll feel the work right in the center, where it should be.
1. The Hundred
Starting Position: Lie on your back with knees in tabletop or legs extended at a 45-degree angle. Arms are by your sides, palms down. Lift head, neck, and shoulders off the mat.
How to Do It:
- Exhale to engage your core and lift your arms and legs into position.
- Begin pumping your arms up and down a few inches while holding the body still.
- Inhale for 5 arm pumps, then exhale for 5 pumps. That’s one cycle.
- Continue for 10 full cycles (100 pumps).
Breathing Cue: Inhale for 5, exhale for 5. Controlled, rhythmic, and deep from the diaphragm.
Watch Out For: Straining your neck or letting your legs drop too low. Keep the chest lifted and abs pulling in, not pushing out.
2. Scissors
Starting Position: Lie on your back with both legs extended straight up. Head, neck, and shoulders lifted, hands lightly supporting one ankle or calf.
How to Do It:
- Inhale, draw your right leg toward you as the left leg lowers to 45 degrees.
- Exhale, switch legs—left comes up, right lowers. Use your core to control the exchange.
- Continue alternating legs with a rhythmic breath pattern.
Breathing Cue: Inhale switch, exhale switch—each breath supports a scissor.
Watch Out For: Jerking the leg toward you or yanking with your arms. The core should do the work, not your biceps or momentum.
3. Criss-Cross
Starting Position: Lie on your back, knees in tabletop. Hands interlaced behind your head, elbows wide. Head and shoulders lifted off the mat.
How to Do It:
- Exhale, rotate your torso to the right as you extend your left leg out.
- Inhale to center.
- Exhale, twist to the left and extend the right leg.
- Continue alternating slowly, emphasizing the rotation from the ribs.
Breathing Cue: Exhale with each twist to deepen the oblique work.
Watch Out For: Yanking on the neck or leading with the elbow. Think of your underarm pointing toward the opposite knee—not your elbow pulling across.
4. Teaser (Prep and Full Version)
Starting Position: Begin lying flat, arms overhead, legs extended. Engage your core before you even begin moving.
How to Do It (Teaser Prep):
- Exhale to lift arms, head, and shoulders up as you raise your legs to tabletop.
- Hold that balance, then return to the mat with control.
How to Do It (Full Teaser):
- From lying down, exhale to lift into a V position: legs extend at a diagonal, arms reach parallel to them.
- Inhale to pause at the top.
- Exhale and roll down through the spine, arms following the same arc.
Breathing Cue: Exhale to rise, inhale to sustain, exhale to lower.
Watch Out For: Hoisting with momentum or tensing your shoulders. This is about controlled spinal flexion, not brute force.
5. Double Leg Stretch
Starting Position: Lie on your back, knees to chest. Head and shoulders lifted, hands on shins.
How to Do It:
- Inhale, reach your arms overhead and legs out to a high diagonal at the same time.
- Exhale, circle the arms and draw the knees back in to the starting position.
- Repeat with precision and active core engagement throughout.
Breathing Cue: Inhale to reach, exhale to return.
Watch Out For: Letting your back lift off the mat. If you feel pressure in your lower spine, bring the legs higher or keep them bent.
6. Forearm Plank (with Core Awareness)
Starting Position: Forearms on the mat, shoulders stacked above elbows. Legs extended, toes tucked. Body in one long line from head to heels.
How to Do It:
- Press into your forearms and pull your belly toward your spine.
- Engage glutes, thighs, and shoulders to stay strong throughout your body.
- Hold with steady breath for 30 seconds, then build up as you gain strength.
Breathing Cue: Inhale to stabilize, exhale to deepen abdominal engagement.
Watch Out For: Sagging hips, hiked-up shoulders, or flared ribs. Your pelvis should feel level, and your core should feel steady—not shaky.
How to Safely Engage Your Core in Every Exercise
This isn’t about sucking in. It’s about firing up the right muscles in the right sequence. Here’s your quick core-engagement checklist:
- Start by breathing deep into your ribs. Let your belly stay soft during the inhale, then gently gather your abdominal wall in and up as you exhale.
- Feel the corset effect. Your abs should feel like they’re wrapping around your waist, not clenching forward.
- Don’t flatten your low back unless cued. Maintain neutral when possible so deep stabilizers do the work, not just the top layers of your abs.
- Keep the work internal. The strongest core doesn’t look like anything from the outside—it feels like internal support that can hold a position without collapsing.
Why Form Beats Reps Every Time
If you do one rep with control, that’s worth more than ten done with strain or misalignment. This is core work, not ab punishment. Quality doesn’t just prevent injury; it supercharges your progress.
Slow down. Breathe with intent. Let the movement come from your center. Do that consistently, and your core won’t just look stronger. It’ll become your most reliable source of strength in everything you do—on the mat and beyond.
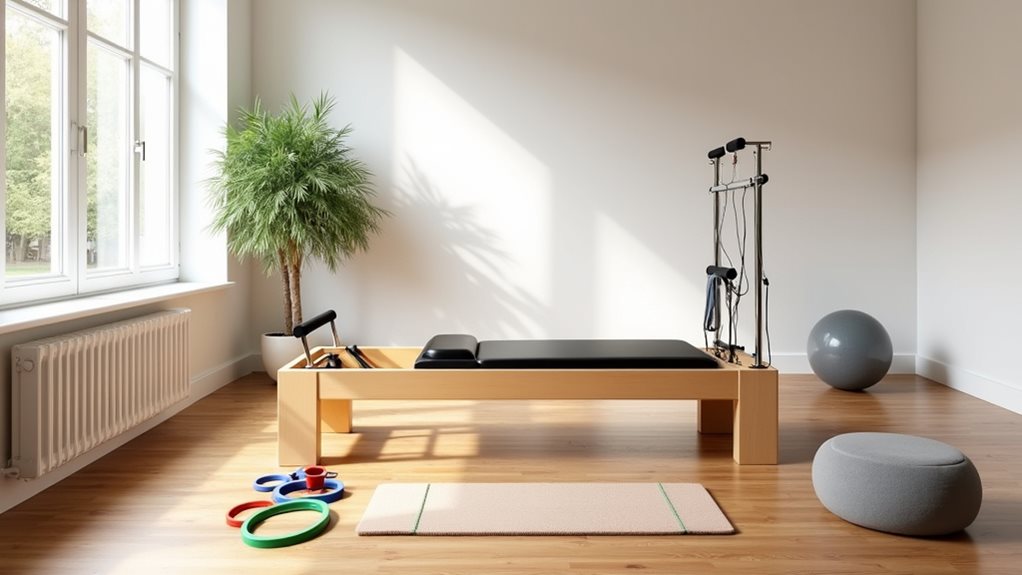
Mat and Floor Pilates Exercises
One of the best parts about Pilates? You can do a highly effective session on nothing more than your living room floor. If you’ve got space to lie down and stretch your arms and legs without hitting a wall or coffee table, you’ve got a studio. That’s the beauty of mat and floor-based Pilates—it’s accessible, adaptable, and extremely efficient. You don’t need a reformer. You don’t need props. You just need your body, your mind, and consistency.
Why Mat Pilates Works
Mat Pilates isn’t the “lite” version of Pilates. It’s the foundation. This is where you build key patterns, understand your body, and develop the muscle control that makes everything stronger going forward. Some people think skipping the machines means you’re doing less. Wrong. Mat work demands more awareness and more strength because you don’t have springs or platforms supporting you. Your body does the work. Your core earns the results.
What You’ll Get From Floor-Based Training
- Full-body conditioning without joint stress. No impact, no pounding—just precision and control.
- True core engagement. Every movement begins from your powerhouse and spreads out into the limbs.
- Improved coordination and balance. You’ll develop stability that translates into everything else you do.
Start simple. Stay consistent. That’s what makes mat Pilates work.
How to Set Up Your At-Home Pilates Space
Before you press play on a video or start running through exercises, take a minute to prep your environment. This makes your routine smoother and helps you stay focused during the work.
- Clear a flat area the length of your body plus arm reach. You don’t want to have to stop mid-Roll-Up because you’re bumping into furniture.
- Use a high-quality mat. Not a foam pad, not your rug. Invest in a true Pilates or yoga mat that gives firm support without being too squishy.
- Quiet matters. This isn’t a background-noise kind of practice. Turn off distractions. Let your brain fully drop into the movement.
- Grab a towel or pillow nearby if needed. You can use these for support under your head, hips, or knees if you need comfort or modification.
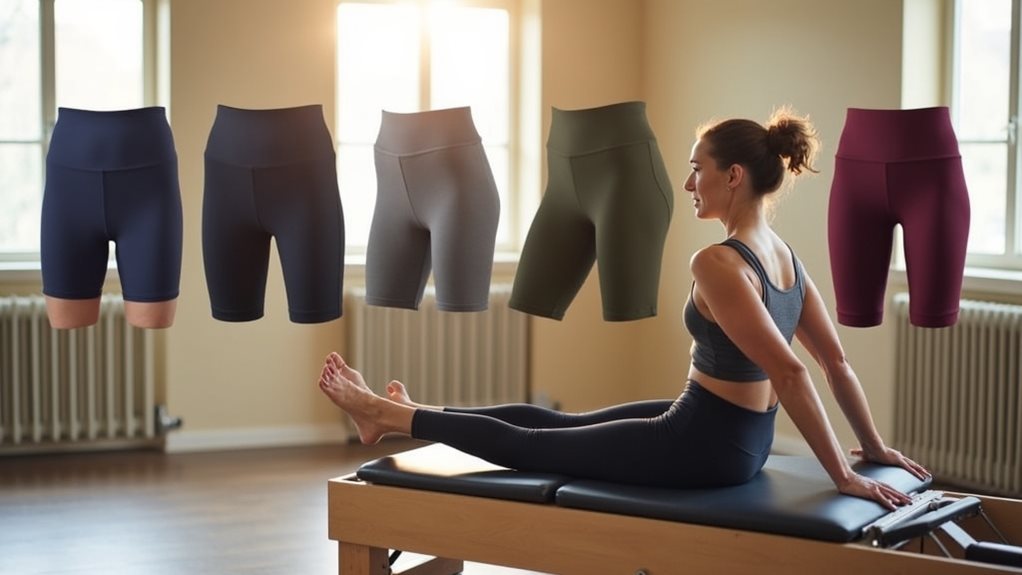
- Wear form-fitting clothes. Loose clothing hides alignment. You want to see your body’s lines and feel stable without adjusting your outfit every two minutes.
You don’t need the “perfect” home setup. You just need an intentional one. Treat it with respect, and your body will respond in kind.
Mat Pilates Sequence Template You Can Use
Create a simple framework to structure your at-home mat work. This helps prevent guesswork and keeps your session focused from start to finish.
- Centering and Breath (2–3 minutes): Lie in a neutral spine, focus on rib cage breathing, and connect to your abdominal wall gently with each exhale.
- Warm-up Movements (3–5 minutes): Choose from Pelvic Curl, Spine Twist Supine, or Cat-Cow. Goal is to mobilize the spine and wake up your core.
- Main Series (10–15 minutes): This is where you build heat and strength. Combine 3 to 5 beginner or core-focused exercises. Stick with ones you’ve mastered before layering more.
- Control and Balance (5 minutes): End with slower, deeper movements like Teaser Prep, Roll-Up, or Kneeling Arm Circles. These challenge your awareness without rushing you.
- Cool-down / Reset (2–3 minutes): Finish with gentle stretches like Child’s Pose or Supine Twist. Let your breath slow and your nervous system settle.
Use that outline every time you train. Variation is fine, but structure builds habit and progress.
Modify with Purpose, Not Excuses
Not every position or movement will feel great at first, especially if you’re returning to movement or dealing with stiffness. That doesn’t mean you should sit out. It means you adjust intelligently.
- Use pillows or folded towels under your head or hips to shorten the range of motion or improve spinal alignment when lying down.
- Bend your knees in long-leg exercises to reduce hamstring pulling or back tension.
- Focus on torso stillness before adding leg movement. If your pelvis rocks during leg extensions, scale it back until you can stabilize fully.
Good Pilates isn’t about performing perfectly. It’s about practicing consciously, in your body, without rushing.
Mat Work Builds Autonomy
When you can train effectively on your floor, you’re no longer dependent on instructors, studios, or machines. You own your practice. You own your progress. And that’s what Pilates was always meant to do.
If you’re building a home routine, start with mat work and never underestimate it. Over time, you’ll learn what your body actually needs—and know how to give it—without chasing fitness fads or expensive memberships.
This is body education as much as it’s exercise. Slow down. Focus in. And trust the method. Mat Pilates will carry you farther than you think.
Creating a Pilates Routine at Home
You’ve got the basics. You’ve carved out space on your floor. Now it’s time to build something reliable—something that doesn’t just feel good once, but actually works week after week. A consistent home routine is where Pilates begins to pay off in a real way. No fancy gear. No studio fees. Just you, your mat, and a method that delivers.
Structure Your Routine Like a Pro
A balanced Pilates session isn’t about doing random moves in a random order. It follows a smart structure that prepares your body, builds toward complexity, and winds down with intention. Here’s how to break it down.
1. Warm-Up (5–7 minutes)
The goal here is not to get sweaty. It’s to wake up your brain-body connection, align your spine, and activate your deep stabilizers. Don’t skip this part—it sets the tone for quality movement throughout your session.
- Start with breath work in neutral spine. Lying on your back with knees bent, spend a few smooth breaths expanding your ribs, engaging your abdominals with each exhale.
- Add 2 to 3 mobility-focused exercises. These might include Pelvic Curl, Spine Twist Supine, or Cat-Cow (kneeling). Focus on control, not speed.
2. Core Activation and Strength (10–15 minutes)
This is the heart of your session. You’re not doing endless reps—you’re dialing in high-quality movement that builds strength from your powerhouse outward. Choose 4 to 6 exercises and move through them one at a time with full attention.
Sample structure:
- Start with supine core work (Chest Lift, Single Leg Stretch, or The Hundred)
- Add spinal articulation (Roll-Up or Pelvic Curl)
- Include a stability challenge (Leg Circles, Forearm Planks, or Bird-Dog)
- Round it out with back body (Swimming Prep or Prone Arm Raises)
Reps don’t matter if form is sloppy. Focus on control, breath, and clean movement.
3. Cool-Down and Integration (5–7 minutes)
Your nervous system responds better when you finish a session by dialing things down. That doesn’t mean just flopping into child’s pose. It means moving with softness and purpose to integrate your work and leave your body feeling balanced.
- Slow, gentle stretches. Try Supine Twist, Cat-Cow flow, or Seated Forward Fold.
- Conscious breathing. Lie in constructive rest position, close your eyes, and take a few steady breaths. Let it settle.
Creating a Weekly Practice Plan That Sticks
One session is great. But consistency is where your body starts to change. If you’re not sure how to stay on track, keep things simple and flexible.
Step-by-Step Weekly Framework (Beginner)
- 2 to 3 days a week. Non-consecutive days are ideal. This gives your body time to recover and absorb the work.
- 20 to 30 minutes per session. You don’t need a marathon workout. Focused, consistent effort is what moves the needle.
- Rotate focus areas. One day, core. Another day, back and mobility. Another, full-body balance and control.
Plot it. Don’t improvise it. “I’ll do it when I’m free” turns into “I never got to it.”
Progressing Safely Over Time
The goal isn’t to jump into advanced workouts just because you “should.” It’s to deepen your control, internal strength, and confidence. Here’s how to know you’re ready to build more challenge into your practice.
- You can maintain form for 8 to 10 solid reps. No torso rocking, no breath-holding, no straining.
- You understand the cues. You know what neutral spine, articulation, and stability feel like in your body.
- You can move through transitions smoothly without losing engagement.
Once you’re here, start layering in more complex variations. Add time under tension. Add reps slowly. Sequence mini circuits using 3 to 4 exercises in a row while maintaining precision. That’s how you level up in Pilates—never rushed, always earned.
Staying Motivated When You’re Training Alone
Let’s be honest. Practicing at home takes discipline. There’s no instructor watching. No class environment pushing you. But there are ways to keep yourself showing up on the mat—even when motivation dips.
- Set a specific routine time. Morning, lunch break, or evening—whatever time works, lock it in and show up like it’s a non-negotiable.
- Use a tracking chart. A basic calendar where you check off your session goes surprisingly far in keeping momentum alive.
- Keep sessions short and focused. Don’t fall into the “I need a full hour” trap. Ten powerful minutes with intention beats skipping it altogether.
- Cycle in a new exercise every two weeks. Adding one fresh challenge can spark new energy and renew your focus.
Pilates isn’t about motivation—it’s about commitment. Showing up for yourself consistently builds strength on and off the mat.
Safety Without Supervision: What to Watch For
Without an instructor present, self-checks are critical. You’ll need to tune into your body and know how to spot a red flag before it turns into strain.
- Avoid forcing range of motion. If a stretch or twist feels sharp or shaky, back off and reduce your range.
- Check your breath. If you’re holding your breath, your core isn’t supporting the movement. Recalibrate and reset.
- Protect your neck and low back. These are the most common compensation points. If they’re doing the work, your form is off.
- Use mirrors or record yourself occasionally. It’s not about vanity. It’s about form feedback. You may feel straight, but look anything but.
When in doubt, simplify. Regress the move, slow it down, and re-engage your center. The only bad workout is the one that wrecks your alignment or causes pain.
This Isn’t Just Exercise. It’s Ritual.
Building a home routine isn’t about ticking off reps. It’s about building trust in your body. Awareness in your movement. Clarity in your practice. Pilates works best when it becomes a rhythm—not a chore, not a punishment, but a daily investment in how you feel and live in your body.
Keep showing up. Keep refining. This is mastery in motion.
Tips for Practicing Pilates Safely and Effectively
It’s easy to get swept up in the idea of perfecting Pilates form or trying harder versions of exercises before you’re ready. But here’s what matters most: safety, self-awareness, and consistency. When you work with your body—and not against it—you get stronger, avoid setbacks, and actually enjoy the process. Below are real-world tips that keep your Pilates practice smart, sustainable, and dialed into progress that lasts.
1. Get Your Breathing Working for You
Breathing isn’t background noise in Pilates. It anchors your core, supports your movement, and sets your rhythm. If you skip this, you’re only getting part of the benefit.
- Inhale through the nose, expanding the ribs. This opens the chest without lifting the shoulders, keeping your upper body relaxed but engaged.
- Exhale through the mouth while activating your abs. Draw the abdominal wall in and up without collapsing your posture. This firms up your center and preps your body to move with strength, not strain.
- Match breath to movement flow. Generally, inhale to prepare, exhale to move. When in doubt, exhale on the effort—it helps you engage deeper muscles with less tension in the neck or jaw.
If you’re ever unsure what’s off in your movement, start by checking your breath. Fix that, and everything else gets easier.
2. Prioritize Alignment Over Ambition
You can push for more reps, longer holds, and trickier variations—but none of it matters if your setup is skewed. Alignment is your blueprint. Without it, the work doesn’t go where it should, and injury risk rises fast.
- Spine in neutral means natural curves stay intact. Don’t flatten or over-arch unless the exercise specifically cues it. Your back should feel supported, not pressed or pinched.
- Pelvis should feel balanced. Picture a bowl of water on your hips. If it tips, your core disengages, and you brace instead of stabilize.
- Shoulders down and wide—not up by your ears. Create space through your neck so your head floats instead of jams into the mat.
If alignment is off, regress or pause. Reinforce form before adding challenge. Strength follows precision—never the other way around.
3. Control the Pace—Always
This isn’t a race. Going fast masks compensation. True control means slowing down enough to feel what’s going on inside your body.
- Move slowly, especially on the way down or in the return phase of each exercise. That’s when most people lose engagement.
- Pause at the hard spots—not the easy ones. Holding a Teaser at the top tells you way more about your depth of strength than racing past it.
- If your quality drops, you’re going too fast. Stop, regroup, then resume with better mechanics and steadier breath.
Speed will come. Control has to come first. That’s what builds a durable Pilates practice.
4. Listen to Your Body (the Right Way)
There’s a difference between discomfort and danger. You’ll learn to work with discomfort—it’s how progress feels. But pain, pressure, or instability? That’s not your cue to “push through.” That’s your cue to adapt.
- If you feel it in your neck or lower back, you’re compensating. Shift the load back to your core. If that doesn’t work, modify the move or try a supported variation.
- Shaky doesn’t equal strong. If you’re trembling because muscles are working, that’s okay. But if your form is collapsing, you’re past your safe edge.
- Rest is a reset, not a fail. Drop your head, hug your knees, or bring legs to the floor if needed. That’s how you build awareness—not burnout.
Pilates teaches you to feel the difference between effort and overload. Respect the signal, adjust the work.
5. Use Modifications That Serve You
Modifications aren’t shortcuts. They’re intelligent tools. The goal is to perform the movement with good form in your body, not someone else’s.
- Bend knees or bring feet to the mat in ab exercises if your lower back lifts off the floor. Better to keep spinal contact and connection than fight for imaginary leg height.
- Add a folded towel or block under your hips or head for support. Sometimes a little lift helps align the spine and improve comfort without compromising the exercise.
- Stay in prep versions longer than you think you need. If you can master them with perfect form, you’ll be stronger and safer when you finally level up.
Don’t outpace your awareness just to check a box. Modify what challenges you in a healthy, connected way.
6. Progress With Intention, Not Impulse
You get stronger by layering—not leaping. Add challenge gradually and only once your base feels clean and automatic.
- Increase reps only if your last ones still feel precise. If form deteriorates, you’re not ready for more—yet.
- Try time-based holds instead of reps for endurance. For example, hold a forearm plank for [insert duration], focusing on internal lift and steady breath.
- Blend two familiar moves into a mini circuit. This challenges control without needing complicated choreography.
Progression should feel earned—not forced. That’s what keeps your body adapting without breaking down.
7. Keep Checking In
When you’re solo in your practice, your eyes can lie. But repetition teaches rhythm. Use these mini check-ins to stay grounded.
- Am I breathing or bracing? If your breath locks up, back off until you can move again with control.
- Is my core initiating or just reacting? Movement should start from your center, not fling from your limbs.
- Where do I feel the work? If it’s not where you intend (like the abdominals), adjust your form until it is.
Every session is a conversation with your body. Stay present enough to actually listen.
Practice Smart, Not Just Hard
Thinking your way through a workout doesn’t make it less powerful—it makes it sustainable. Every rep matters. Every breath counts. This kind of attention builds strength that actually shows up in your life—not just your joints or, worse, your injury history.
Slow it down. Dial it in. That’s how Pilates delivers long-term, injury-resistant strength.
Visualizing Pilates Exercises
You can read every cue perfectly and still miss the mark if you can’t picture the movement. That’s where visual aids come in. When you actually see how a movement unfolds—where the spine flexes, how the limbs align, what activation looks like—your brain and body get on the same page faster. Especially when you’re training solo at home, visuals bridge the gap between theory and execution.
Why Visual Tools Matter in Pilates
Pilates doesn’t rely on bulk movement. It’s all about subtle adjustments: slight shifts in pelvic tilt, nuanced rib placement, controlled breath patterns. These things are hard to grasp just from text, especially for beginners. Visuals cut through the noise. They give your brain a clear map of what good form looks like—and just as importantly, what poor form looks like so you can spot it in yourself.
- You absorb alignment faster. Seeing a properly executed move locks in landmarks: where the knees track, how the arms line up with the shoulders, what a neutral spine actually looks like lying on the mat.
- You build muscle memory more effectively. Watching movement reinforces coordination, so you can repeat it with more confidence and less second-guessing.
- You fix form mistakes in real time. Pausing a video or replaying a specific rep gives you time to compare and self-correct.
When you train visually, you’re not just watching. You’re learning how to embody precision.
What to Look for in Pilates Videos and Demos
There are plenty of Pilates videos online, but not all are created equal. Poor visuals lead to poor movement. Use these filters to make sure what you’re watching will actually support your practice—not confuse or mislead you.
- Clean, unobstructed camera angles. You should be able to see the full body, especially spine and limb position. If you’re constantly guessing leg alignment or torso angle, skip it.
- Slow, deliberate movement pace. The model or instructor should move in real time with detail—not rush through reps. Fast, flashy transitions look good but don’t teach much.
- Clear anatomical alignment. Are their knees tracking over ankles? Is the pelvis balanced? Shoulders down? You want form that matches cueing standards taught in Pilates—not just what’s popular on social media.
- Stable camera—no shake, minimal edits. You need continuity for your brain to absorb sequencing and attention to detail. Constant jump-cuts are a red flag.
- Audio cues that match visuals. If they’re cueing breath or movement, the visuals should demonstrate that moment clearly. If there’s a mismatch, your form will suffer.
Never chase style over substance. A black-and-white studio edit won’t help if the technique being shown is off. Let quality movement lead your choices.
How to Use Visuals to Learn, Not Just Watch
Watching a Pilates demo is passive. Using that video as a movement learning tool is active. Here’s how to make the most of visual content:
- Watch once without moving. Observe the full move. Pay attention to setup, breath, alignment, and any shifts in body position.
- Replay and mirror slowly. Go section by section. Just do the starting position first. Then try the movement. Then check your positioning against the visual again.
- Record your own form, then compare. A short phone video side-by-side with your reference shows you objectively what needs adjusting—pelvic angle, shoulder height, core engagement.
- Use visuals to troubleshoot specific cues. If “shoulders down” isn’t clicking, rewind a video and look at the collarbone-spine relationship. Your eyes catch patterns your body misses.
Don’t binge-watch. Break it down. Practice one movement at a time visually until it feels internal.
Recommended Types of Visual Resources
Since specific brands or names aren’t listed, stick with these categories when searching for visual guides:
- Certified instructor-led Pilates demonstrations. Look for titles or descriptions that confirm teaching credentials and classical or contemporary training background.
- Short-form tutorials for single exercises. These are perfect for isolating one movement and studying it in depth without overwhelming amounts of information.
- Side-by-side beginner and advanced versions. This helps you visualize how a movement evolves over time, gives you a mental path for progression, and shows real modifications in action.
- Silent or cue-less demonstrations for practice. If you’ve already learned the move, these are great for following visually without constant verbal input. It refines concentration and flow.
Combine visuals with mindful repetition. That’s what deepens the body-brain connection.
How to Build a Visual Habit into Your Practice
Set one intentional visual check into every home session:
- Before session: Watch one demo of an exercise you’ll be doing today. Pay attention to mechanics before you move.
- During session: Keep a mirror nearby or record one rep for form review. This catches slouching or misalignments you didn’t feel.
- After session: Save a video or image of an exercise that felt tough or confusing. Revisit it later to reinforce correct execution.
Your eyes sharpen your awareness. Use them accordingly.
Visuals Are a Guide—Not a Crutch
Don’t get hooked on trying to look exactly like someone else on screen. Bodies are built differently. Focus on principles: stable pelvis, active core, intentional breath, strong alignment. That’s the backbone of Pilates, whether or not your legs match the demo’s angle.
Use visuals to clarify, not chase perfection. They’re your map. You’re still the driver.
Conclusion and Next Steps
You’ve made it to the end, but this isn’t the finish line. It’s the warm-up lap before the real practice begins. Pilates isn’t something you master in one go. It’s something you improve each time you show up—with intention, with awareness, and with consistency.
If this guide has done its job, you understand the structure, principles, and techniques that make Pilates more than just another workout. You’re no longer guessing about what “core engagement” really means or how to create a simple but effective at-home routine. You’ve got the tools. Now it’s about using them consistently.
Pilates Works… When You Work It
Here’s the truth most people won’t tell you: Pilates only delivers if you show up for it regularly. That means setting aside time each week, staying honest about your form, and progressing slowly with purpose instead of chasing intensity for the sake of it.
- Don’t wait to “feel ready.” Start now, exactly as you are.
- If a movement feels unfamiliar, get curious—not frustrated. Pilates teaches through repetition and awareness, not punishment.
- The best session is the one you do consistently. Whether you have 10 minutes or 45, it counts if you do it with focus and control.
Your body already has what it needs to start. It just needs a consistent method—and that’s what Pilates gives you, session after session.
How to Keep Building on Your Practice
No matter where you started, there’s room to deepen. The more you practice, the more you’ll notice subtle shifts: a stronger back, better posture, smoother breath, quicker recovery. Those aren’t accidents. They’re signs you’re integrating the method into your daily life—not just checking off workouts.
Map your next steps with intention:
- Choose 2–3 beginner exercises to master. Repeat them weekly until you can perform them with precision, without extra cues. That’s your foundation.
- Commit to a weekly schedule that fits your life. Whether it’s morning sessions or weekend routines, plot it out like a priority.
- Keep a movement journal. Nothing fancy. Just a list of what you practiced and how it felt. Progress sneaks up when you track it.
- Practice checking in. Not every session will feel amazing—and that’s fine. You’re building awareness, not chasing perfection.
Where to Go When You Want More
When you’re ready to expand beyond solo practice, there are smart ways to level up without losing your focus:
- Look for instructor-led online classes by certified professionals. Not influencers or trend-chasers. You want someone who speaks the language of Pilates fluently and cues clean movement.
- Invest in a short-term private session if possible. Even one solid in-person tune-up can make a huge difference in form and understanding.
- Revisit this guide regularly. Don’t treat it as a one-time read. Let it be your reference point as questions come up and movements evolve.
Your practice will keep changing as you do. That’s the point. Stay rooted in the fundamentals, and you can adapt to new challenges without losing your way.
The next best step isn’t the flashiest variation. It’s the one you can do well, consistently, and with control. That’s how you grow a Pilates practice that actually serves your body, your focus, and your long-term health.
Start today. Keep it simple. Make it yours.